WP Car Manager adds 2 contact buttons to your vehicle detail pages, an email button and a call button. You can setup your email address and phone number on the contact tab of the plugin’s settings.

WP Car Manager adds 2 contact buttons to your vehicle detail pages, an email button and a call button. You can setup your email address and phone number on the contact tab of the plugin’s settings.

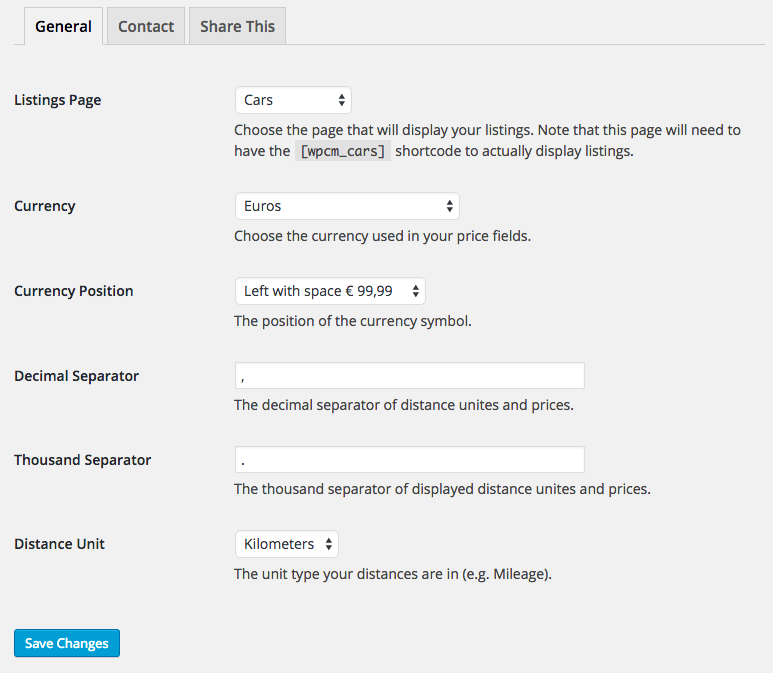
Like you read at the Adding Vehicles article, data is entered as plain data into to backend. WP Car Manager will format your data appropriately when being outputted on your website. To do so, the plugin needs to know what decimal separator an what thousand separator to use.

The default decimal separator is . and the default thousand separator is ,
Like you read at the Adding Vehicles article, data is entered as plain data into to backend. WP Car Manager will format your data appropriately when being outputted on your website. To do so, the plugin needs to know what distance unit to use. You can choose between miles and kilometers.

Please note that changing this unit format will only change the way the data is displayed on your website. We will not calculate the kilometers based on miles when you changed the format.
By default WP Car Manager will display your dates in the following format: m-Y. The m will out the month and the Y will output the year. So if you add a car which was first registered on January 1st 2005, the plugin will display this as 2015-01 by default.
Because there are so many ways of outputting dates, we made the date format a free input field. This means you can display the dates in any way you want. You can use these variables that will turn into these values:
| Variable | Value |
|---|---|
d |
The day |
m |
The month |
Y |
The year |
You can separate these variable with any character you like, by default we separate them with dashes (-) but you can also use a forward slash for example (/).

To make it a bit easier, we’ve made some example date formats you can use. Each example will also have an example date output.
These examples all use the following date: October 1st, 2005
| Format | Example |
|---|---|
d-m-Y |
01-10-2005 |
Y/d/m |
2005/01/10 |
Y |
2005 |
In order to display your vehicle prices correct, you will need to setup your currency in the plugin settings. The plugin comes with 47 currencies you can choose from!
wpcm_currencies filter.You can also set the currency symbol position via the plugin settings.

At the settings page you can set all unit types used by the plugin. You can find the settings page as a submenu item of Car Manager.
The follow unit types can be set:

Upon installation the plugin you will be allowed to let WP Car Manager setup 3 pages, including the ‘Cars’ (could be translated to your websites language) page that contains our listing shortcode.
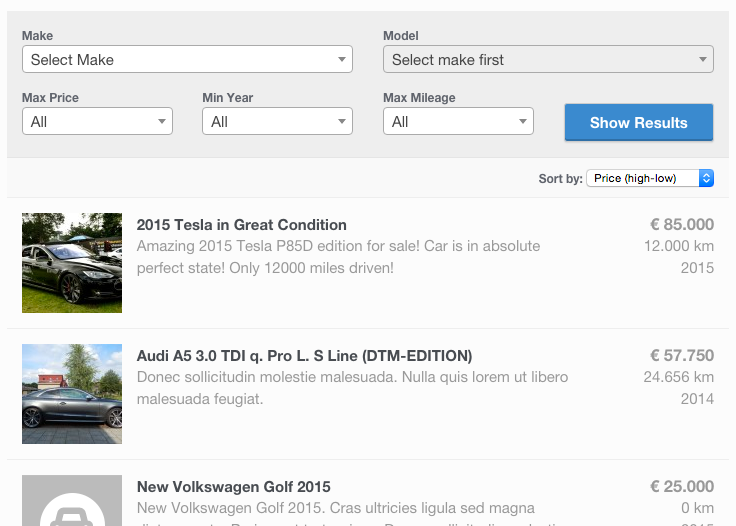
To list your vehicles on your page you simply add the [wpcm_cars] shortcode to a page. The vehicles list will include multiple filters to narrow down the results and the possibility to sort the results.

You can choose to not display the filters and/or the sort feature via shortcode attributes. Setting show_filters to false will not output the filters and setting show_sort to false will not output the sorting select box.
The [wpcm_cars] shortcode comes with various attributes you can use to alter the output of your listings. The table below lists what attributes are available and how to use them. The default value will always be the first listed value and will also be bold.
| Attribute | Description | Pos. Values | Example |
|---|---|---|---|
| show_filters | Show or hide the filter bar at the top of the listing | true, false | [wpcm_cars show_filters="false"] |
| show_sort | Show or hide the sort bar at the top of the listing | true, false | [wpcm_cars show_sort="false"] |
| make | Only display cars of one make | Title of your make, default is empty. | [wpcm_cars make="Tesla"] |
| model | Only display cars of one model. Only works if make is also set and given model has given make as parent. | Title of your model, default is empty. | [wpcm_cars make="Skoda" model="Fabia"] |
| sort | Set default sorting of listing, can be changed if frontend sort select box is displayed(see show_sort) | price-asc, price-desc, frdate-asc, frdate-desc, mileage-asc, mileage-desc, date-asc, date-desc | [wpcm_cars sort="price-desc"] |
| condition | Only display cars with given condition | new, used. Default is empty. | [wpcm_cars condition="used"] |
| featured | Display only featured vehicles (true) or exclude featured vehicles (false). If this attribute is not set, mixed results are displayed. | true, false. Default is empty. | [wpcm_cars featured="false"] |
If you want to list your vehicles without displaying the filters and sorting row, use the shortcode with the following arguments:
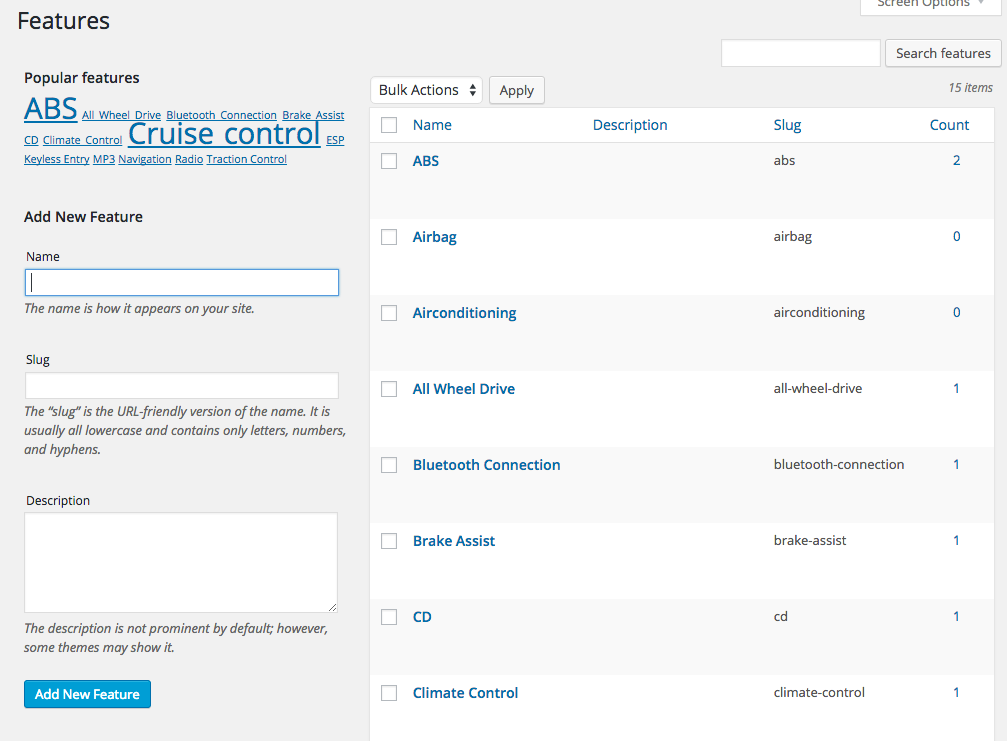
[wpcm_cars show_filters=”false” show_sort=”false”]Features (e.g. ABS or Bluetooth) can be added to cars when adding/editing a car but can also managed at the Features page. The features page can be found as a submenu item of Car Manager.
Features that are added to cars will be displayed in a nice list on the car’s detail page. In the future, features can be used to narrow down car searches.

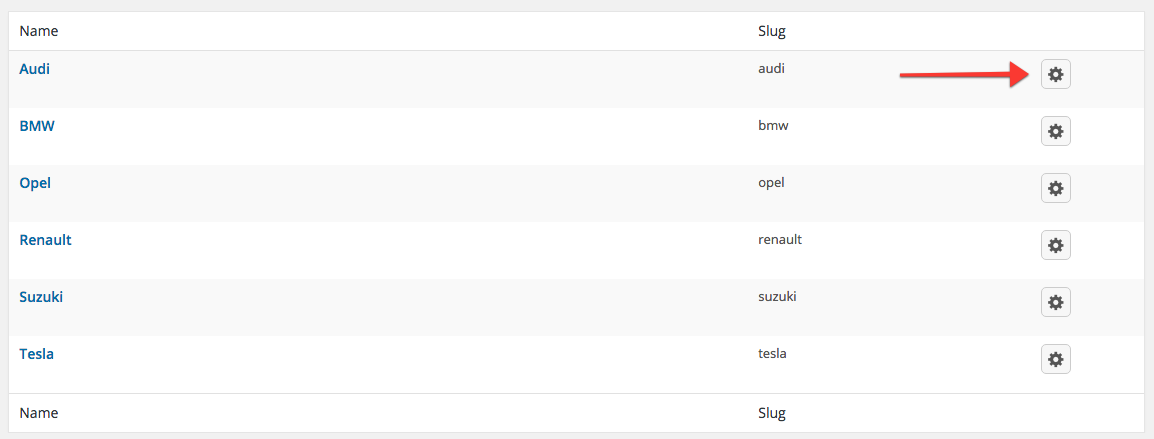
The Makes & Models manage page can be found as a submenu item of WP Car Manager.
After you’ve clicked the Makes & Models submenu item you will be taken to the Makes overview page. You can add new makes using the form on the left of the screen, existing makes will be listed on the right of the screen. To manage a make’s models, click the wheel button.

The models overview page looks very similar to the makes overview page except there isn’t a wheel button. On this page you can add models to the selected make, the models will automatically be loaded on frontend and backend when a make is chosen.
You will notice a new sidebar item in your admin area called Car Manager which is where you can start adding your files. Click ‘Add New’ either from the Car Manager page, or within the sidebar, to add your first car.
When adding a car, you will notice the interface matches that of posts and pages Start by giving your car a title. Note that the car title doesn’t have to be just the car make and/or model, many use this field as the sales pitch of the car!
Enter the car description in the content field, the content field will only be displayed on your car’s detail page. The short description will be displayed in your car listings result page.
The car data meta box contains all the car data fields like make and model. Data enter here will be displayed at the listings and detail pages but will also be used to narrow down searches.
Car features like ABS or Bluetooth can be added in the Features meta box. You can select features that you’ve already added on other vehicles or add new features when adding a new car. Your feature will be displayed nicely in a list on the car’s detail page.
The featured image will generate a thumbnail that will be used in the listings page and will be the first image on your car’s detail page. In the car gallery meta box you can add as many images as you like. Thumbnails of the gallery images will be displayed on the car’s detail page, when clicked they will create an overlay gallery.
When you are done, hit publish to make the car live.